一、安装源和依赖包
#增epel源,如果你是i686系统,请把x86_64修改下。 cd /usr/local/srcwget -O /etc/pki/rpm-gpg/RPM-GPG-KEY-EPEL-6 https://www.fedoraproject.org/static/0608B895.txtrpm --import /etc/pki/rpm-gpg/RPM-GPG-KEY-EPEL-6rpm -Uvh http://dl.fedoraproject.org/pub/epel/6/x86_64/epel-release-6-8.noarch.rpm
#确认是否安装成功 rpm -qa gpg*gpg-pubkey-0608b895-4bd22942
#增puias源 wget -O /etc/yum.repos.d/PUIAS_6_computational.repo https://gitlab.com/gitlab-org/gitlab-recipes/raw/master/install/centos/PUIAS_6_computational.repo 注:如果此处是404,可手动创建 PUIAS_6_computational.repo 源[PUIAS_6_computational]name=PUIAS computational Base $releasever - $basearchmirrorlist=http://puias.math.ias.edu/data/puias/computational/$releasever/$basearch/mirrorlist#baseurl=http://puias.math.ias.edu/data/puias/computational/$releasever/$basearchgpgcheck=1gpgkey=file:///etc/pki/rpm-gpg/RPM-GPG-KEY-puiaswget -O /etc/pki/rpm-gpg/RPM-GPG-KEY-puias http://springdale.math.ias.edu/data/puias/6/x86_64/os/RPM-GPG-KEY-puiasrpm --import /etc/pki/rpm-gpg/RPM-GPG-KEY-puias
#验证是否成功 rpm -qa gpg*gpg-pubkey-41a40948-4ce19266
#查看仓库源
yum repolist#如果此列表中没有epel和PUIAS_6_computational,请执行以下命令:yum-config-manager --enable epel --enable PUIAS_6_computational
二、安装依赖包
yum -y updateyum -y groupinstall 'Development Tools'yum -y install readline readline-devel ncurses-devel gdbm-devel glibc-devel tcl-devel openssl-devel curl-devel expat-devel db4-devel byacc sqlite-devel libyaml libyaml-devel libffi libffi-devel libxml2 libxml2-devel libxslt libxslt-devel libicu libicu-devel system-config-firewall-tui redis sudo wget crontabs logwatch logrotate perl-Time-HiRes git cmake libcom_err-devel.i686 libcom_err-devel.x86_64
#默认centos的git版本是1.7.10,所以要先删除,然后再下载源码安装
yum remove git -y yum install zlib-devel perl-CPAN gettext curl-devel expat-devel gettext-devel openssl-devel mkdir /tmp/git && cd /tmp/git curl --progress https://www.kernel.org/pub/software/scm/git/git-2.1.3.tar.gz | tar xz cd git-2.1.3/ && ./configure && make && make prefix=/usr/local install
#完成后验证
which git /usr/local/bin/git git --version git version 2.1.3
四、安装ruby
#ruby版本需要2.0+,所以先卸载系统已存在的
yum remove ruby
#如果是源码安装的
cd (your-ruby-source-path) && make uninstall
#安装
mkdir /tmp/ruby && cd /tmp/rubycurl --progress ang.org/pub/ruby/2.1/ruby-2.1.2.tar.gz | tar xzcd ruby-2.1.2 && ./configure --disable-install-rdoc && make && make prefix=/usr/local install
#安装bundler
gem install bundler --no-doc
#完成后验证
which ruby /usr/local/bin/ruby ruby -v ruby 2.1.2p95 (2014-05-08 revision 45877) [x86_64-linux]
五、创建系统用户
adduser --system --shell /bin/bash --comment 'GitLab' --create-ome --home-dir /home/git/ git增加/usr/local/binvisudo #修改以下内容 Defaults secure_path = /sbin:/bin:/usr/sbin:/usr/bin:/usr/local/bin
六、安装mysql
#mysql的版本至少5.5.14或更新
[root@www ~]# /usr/local/mysql/bin/mysql --version/usr/local/mysql/bin/mysql Ver 14.14 Distrib 5.6.31, for Linux (x86_64) using EditLine wrapper
安装方法略过
##创建数据库用户并授权
mysql -u root -p mysql> CREATE USER 'git'@'localhost' IDENTIFIED BY 'gitpwd'; mysql> show variables like "%engine";+------------------------+--------+| Variable_name | Value |+------------------------+--------+| default_storage_engine | InnoDB || storage_engine | InnoDB |+------------------------+--------+2 rows in set (0.01 sec) #如果不是InnoDB引擎,需执行下面命令mysql> SET storage_engine=INNODB; #创建数据库CREATE DATABASE IF NOT EXISTS `gitlabhq_production` DEFAULT CHARACTER SET `utf8` COLLATE `utf8_unicode_ci`;#给用户授权GRANT SELECT, LOCK TABLES, INSERT, UPDATE, DELETE, CREATE, DROP, INDEX, ALTER ON `gitlabhq_production`.* TO 'git'@'localhost';#测试是否能够成功登录mysql -ugit -pgitpwd -D gitlabhq_production
七、配置redis
chkconfig redis on cp /etc/redis.conf /etc/redis.conf.orig #修改监听端口(此步骤可忽略)sed 's/^port .*/port 0/' /etc/redis.conf.orig |tee /etc/redis.conf #增加内容echo 'unixsocket /var/run/redis/redis.sock' |tee -a /etc/redis.conf echo -e 'unixsocketperm 0770' |tee -a /etc/redis.conf #创建目录改权限mkdir /var/run/redis chown redis:redis /var/run/redis chmod 755 /var/run/redis #启动服务service redis restart #附加git到redis组usermod -aG redis git
八、安装gitlab
cd /home/git #下载源码sudo -u git -H git clone https://gitlab.com/gitlab-org/gitlab-ce.git -b 7-4-stable gitlab#修改配置cd gitLab/ sudo -u git -H cp config/gitlab.yml.example config/gitlab.ymlsudo -u git -H vim config/gitlab.ymlgitlab: ## Web server settings (note: host is the FQDN, do not include http://) host: localhost port: 80 https: false #修改目录权限chown -R git log/chown -R git tmp/chmod -R u+rwX log/chmod -R u+rwX tmp/chmod -R u+rwX tmp/pids/chmod -R u+rwX tmp/sockets/chmod -R u+rwX public/uploads #创建目录 sudo -u git -H mkdir /home/git/gitlab-satelliteschmod u+rwx,g=rx,o-rwx /home/git/gitlab-satellites #编辑配置文件unicorn.rbsudo -u git -H cp config/unicorn.rb.example config/unicorn.rb #查看系统核心数nproc1 #编辑配置sudo -u git -H vim config/unicorn.rbworker_processes 1 #拷贝配置文件rack_attack.rbsudo -u git -H cp config/initializers/rack_attack.rb.example config/initializers/rack_attack.rb #定义全局的用户和邮箱sudo -u git -H git config --global user.name "GitLab"sudo -u git -H git config --global user.email "example@example.com"sudo -u git -H git config --global core.autocrlf input #编辑连接redis配置#拷贝配置sudo -u git -H cp config/resque.yml.example config/resque.yml #连接redis配置,默认配置,未修改sudo -u git -H vim config/resque.yml 九、配置gitlab数据库文件 sudo -u git cp config/database.yml.mysql config/database.yml #编辑配置文件sudo -u git -H vim config/database.ymlproduction: adapter: mysql2 encoding: utf8 collation: utf8_general_ci reconnect: false database: gitlabhq_production pool: 10 username: git password: "gitpwd" host: localhost socket: /var/lib/mysql/mysql.sock #修改文件权限,只有git用户可读sudo -u git -H chmod o-rwx config/database.yml 十、安装gem cd /home/git/gitLab sudo -u git -H bundle install --deployment --without development test postgres aws
十一、安装gitlab-shell
官网上给的gitlab-shell版本是2.1.0,后面会有问题(本地到远程不能连接),网上查找问题是版本问题,需要gitlab-shell的版本是2.0.1sudo -u git -H bundle exec rake gitlab:shell:install[v2.0.1] REDIS_URL=unix:/var/run/redis/redis.sock RAILS_ENV=production #编辑配置sudo -u git -H vim /home/git/gitlab-shell/config.yml---user: gitgitlab_url: https://localhost/http_settings: self_signed_cert: truerepos_path: "/home/git/repositories/"auth_file: "/home/git/.ssh/authorized_keys"redis: bin: "/usr/bin/redis-cli" namespace: resque:gitlab socket: "/var/run/redis/redis.sock"log_level: INFOaudit_usernames: false
十二、初始化数据库
sudo -u git -H bundle exec rake gitlab:setup RAILS_ENV=production #可以设置管理员密码(此步骤可省略。。。)sudo -u git -H bundle exec rake gitlab:setup RAILS_ENV=production GITLAB_ROOT_PASSWORD=newpassword 十三、下载服务脚本 wget -O /etc/init.d/gitlab https://gitlab.com/gitlab-org/gitlab-recipes/raw/master/init/sysvinit/centos/gitlab-unicorn chmod +x /etc/init.d/gitlab chkconfig --add gitlab chkconfig gitlab on #设置logrotatecp lib/support/logrotate/gitlab /etc/logrotate.d/gitlab #检测应用状态sudo -u git -H bundle exec rake gitlab:env:info RAILS_ENV=production sudo -u git -H bundle exec rake assets:precompile RAILS_ENV=production #启动服务service gitlab start
十四、配置web服务
yum -y install nginxchkconfig nginx onmkdir /etc/nginx/sites-availablemkdir /etc/nginx/sites-enabledwget -O /etc/nginx/sites-available/gitlab https://raw.github.com/gitlabhq/gitlab-recipes/master/web-server/nginx/gitlab-sslln -sf /etc/nginx/sites-available/gitlab /etc/nginx/sites-enabled/gitlab 编辑/etc/nginx/nginx.conf,将 include /etc/nginx/conf.d/*.conf; 替换成 include /etc/nginx/sites-enabled/*;,就是修改额外加载的配置文件目录。编辑/etc/nginx/sites-available/gitlab,将配置中server_name替换成实际访问的域名。#将nginx加入git用户组usermod -a -G git nginxchmod g+rx /home/git/#添加ssl证书或者自己生成一个cd /etc/nginx && openssl req -new -x509 -nodes -days 3560 -out gitlab.crt -keyout gitlab.key#启动nginxservice nginx start
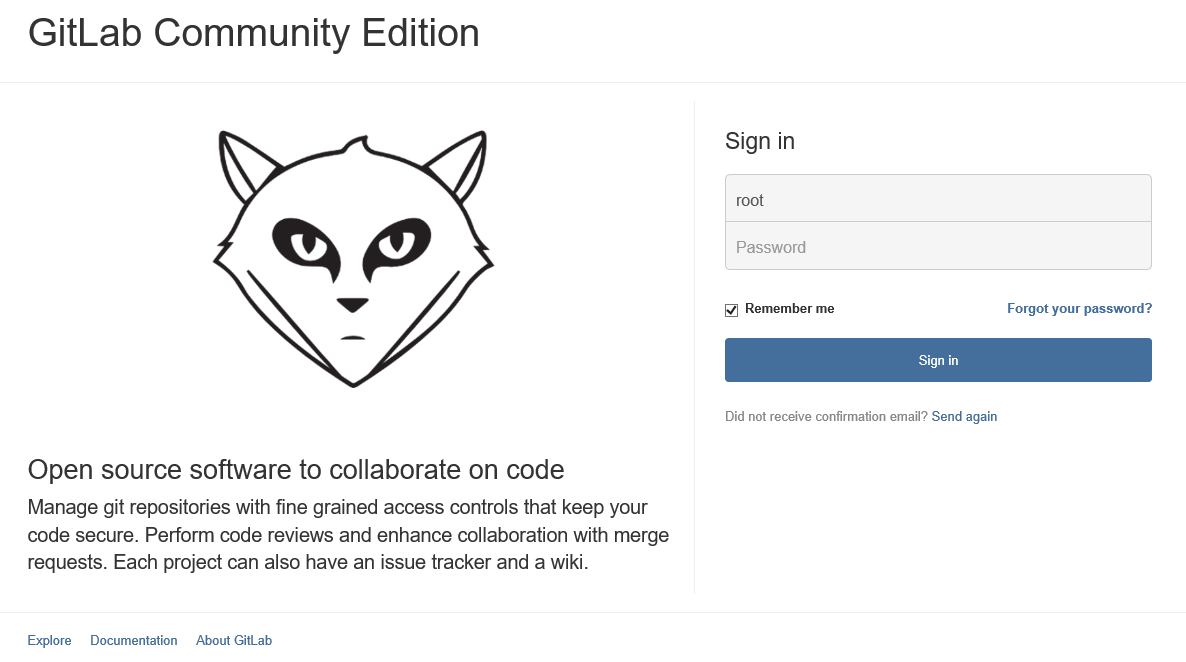
#登陆
用户名/密码root/5iveL!fehttps://192.168.16.111/users/sign_in
nginx基于http的配置()
[root@node4 gitlab]$ sudo wget https://raw.github.com/gitlabhq/gitlab-recipes/master/init/sysvinit/centos/gitlab-unicorn -P /etc/init.d/gitlab 内容#!/bin/bash# Include RedHat function library. /etc/rc.d/init.d/functions# The name of the serviceNAME=${ 0##*/}### Environment variablesRAILS_ENV="production"# The username and path to the gitlab sourceUSER=gitAPP_PATH=/home/$USER/gitlab# The PID and LOCK files used by unicorn and sidekiqUPID=$APP_PATH/tmp/pids/unicorn.pidULOCK=/var/lock/subsys/unicornSPID=$APP_PATH/tmp/pids/sidekiq.pidSLOCK=/var/lock/subsys/sidekiq# Evaluate the real path for the user (should already have RVM)PATH_PATCH="PATH=$(su $USER -s /bin/bash -l -c "echo \"\$PATH\"") && export PATH && "start() {cd $APP_PATH# Start unicornecho -n $"Starting unicorn: "daemon --pidfile=$UPID --user=$USER "$PATH_PATCH RAILS_ENV=$RAILS_ENV bin/web start"unicorn=$?[ $unicorn -eq 0 ] && touch $ULOCKecho# Start sidekiqecho -n $"Starting sidekiq: "daemon --pidfile=$SPID --user=$USER "$PATH_PATCH RAILS_ENV=$RAILS_ENV bin/background_jobs start"sidekiq=$?[ $sidekiq -eq 0 ] && touch $SLOCKechoretval=$unicorn || $sidekiqreturn $retval}stop() {cd $APP_PATH# Stop unicornecho -n $"Stopping unicorn: "killproc -p $UPIDunicorn=$?[ $unicorn -eq 0 ] && rm -f $ULOCKecho# Stop sidekiqecho -n $"Stopping sidekiq: "killproc -p $SPIDsidekiq=$?[ $sidekiq -eq 0 ] && rm -f $SLOCKechoretval=$unicorn || $sidekiqreturn $retval}restart() {stopstart}get_status() {status -p $UPID unicornunicorn=$?status -p $SPID sidekiqsidekiq=$?retval=$unicorn || $sidekiqreturn $retval}query_status() {get_status >/dev/null 2>&1return $?}case "$1" instart)query_status && exit 0start || exit 1;;stop)query_status || exit 0stop || exit 1;;restart)restart || exit 1;;status)get_statusexit $?;;*)N=/etc/init.d/$NAMEecho "Usage: $N {start|stop|restart|status}" >&2exit 1;;esacexit 0 [root@node4 gitlab]$ sudo mv /etc/init.d/gitlab-unicorn /etc/init.d/gitlab[root@node4 gitlab]$ sudo chmod +x /etc/init.d/gitlab[root@node4 gitlab]$ sudo chkconfig --add gitlab[root@node4 gitlab]$ sudo chkconfig gitlab on[root@node4 gitlab]$ sudo /etc/init.d/gitlab start[root@node4 gitlab]$ cp lib/support/nginx/gitlab /usr/local/nginx/conf/conf.d/[root@node4 gitlab]$ cd /usr/local/nginx/conf/conf.d/[root@node4 gitlab]$ sudo chown -R git:git .[root@node4 conf.d]$ cp gitlab gitlab.conf[root@node4 conf.d]$ vi gitlab.confupstream gitlab { server unix:/home/git/gitlab/tmp/sockets/gitlab.socket;}server { listen 80 default_server; # e.g., listen 192.168.1.1:80; In most cases *:80 is a good idea server_name your domain; # e.g., server_name source.example.com; server_tokens off; # don't show the version number, a security best practice root /home/git/gitlab/public; client_max_body_size 5m; access_log logs/gitlab_access.log; error_log logs/gitlab_error.log; location / { try_files $uri $uri/index.html $uri.html @gitlab; } location @gitlab { proxy_read_timeout 300; # https://github.com/gitlabhq/gitlabhq/issues/694 proxy_connect_timeout 300; # https://github.com/gitlabhq/gitlabhq/issues/694 proxy_redirect off; proxy_set_header X-Forwarded-Proto $scheme; proxy_set_header Host $http_host; proxy_set_header X-Real-IP $remote_addr; proxy_set_header X-Forwarded-For $proxy_add_x_forwarded_for; proxy_pass http://gitlab; }}[root@node4 conf.d]$ sudo service nginx restart[root@node4 conf.d]$ cd /home/git/gitlab[root@node4 gitlab]$ bundle exec rake assets:precompile RAILS_ENV=production[root@node4 gitlab]$ sudo service gitlab restart
遇到的问题:
启动后打开页面显示 502 错误:
解决方法:看日志

2016/10/28 11:50:46 [crit] 15189#0: *6 connect() to unix:/home/git/gitlab/tmp/sockets/gitlab-workhorse.socket failed (2: No such file or directory) while connecting to upstream, client: 192.168.16.231, server: 192.168.16.111, request: "GET /static.css HTTP/1.1", upstream: "http://unix:/home/git/gitlab/tmp/sockets/gitlab-workhorse.socket:/static.css", host: "192.168.16.111", referrer: "https://192.168.16.111/users/sign_in"
此时需要修改 nginx 里 gitlab.socketde 路径
nginx.conf 配置文件
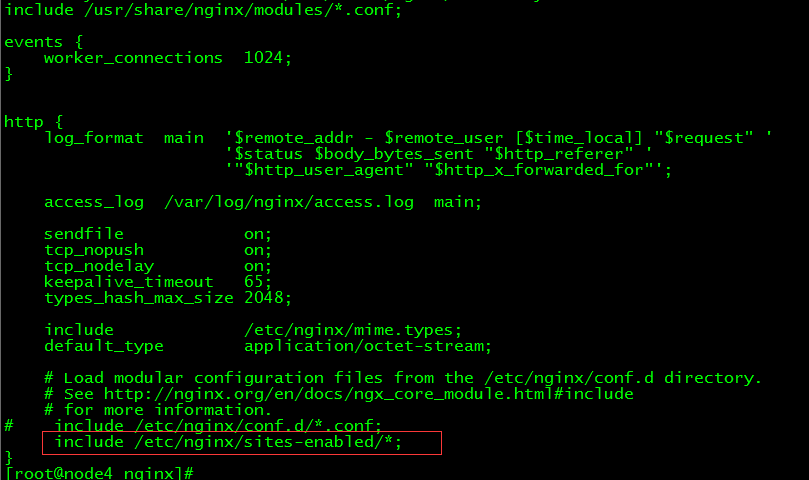

图中红框内的socket文件改成 /home/git/gitlab/tmp/sockets 路径下存在的socket文件
